QuarkXR Help Articles
The QuarkXR Portal is the entry point into the QuarkXR Platform, and is where users create and manage digital twins, XR apps, and other types of 3D content. It is where organization onboard stakeholders, 3D assets, and run various workflows.
This page details how to navigate and use the QuarkXR Portal.
Note: Logging into and using the QuarkXR Portal requires an active subscription.
Getting Started
Login to the QuarkXR Portal
- Navigate to the portal:
Visit www.quarkxr.com. In the upper right corner of your screen, you will see the options to 'Sign up' or 'Log in'.
Note: Enterprise users should visit www.portal.quarkxr.com to log in and use the QuarkXR Portal.
- Enter your credentials:
Sign in with your e‑mail address and password. After a successful login you are taken back to the QuarkXR website. A button labeled 'Open QuarkXR Portal' will appear in the upper right corner of your screen. When clicked, it redirects you to the QuarkXR Portal home page
- Workspace overview:
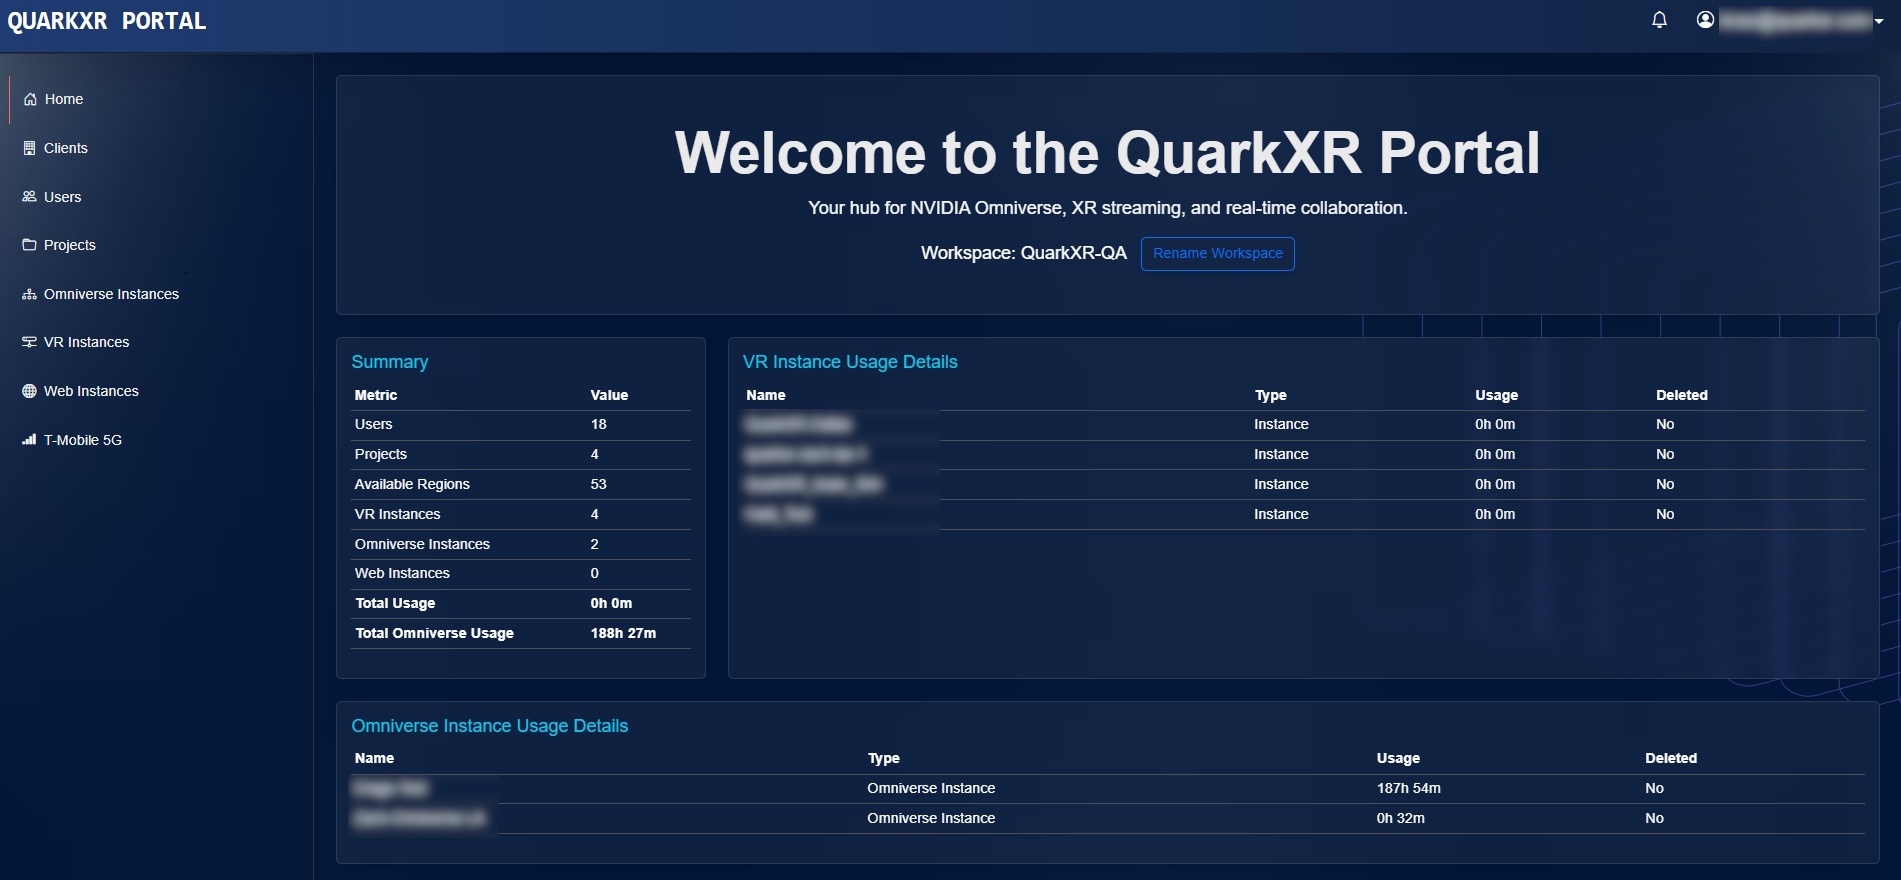
The home page shows key metrics for your workspace (number of users, projects, available regions, VR instances and Omniverse instances). The top‑right corner displays your logged‑in e‑mail address with a dropdown containing Manage billing and Logout options.
Navigating the portal
- Navigation menu: A vertical menu on the left provides quick access to tabs such as Home, Users, Projects, Omniverse Instances, VR Instances, Web Instances and T‑Mobile 5G.
- Workspace name: Your workspace (e.g., “Company Inc.”) appears at the top of the home page. You can click the 'Rename Workspace' button to rename the workspace.
- Notifications: A bell icon next to your e‑mail indicates file upload notifications. Refer to the 'Projects' section for more details.
- Logout: Use the dropdown next to your e‑mail (top right) and choose Logout when finished.
Manage Billing
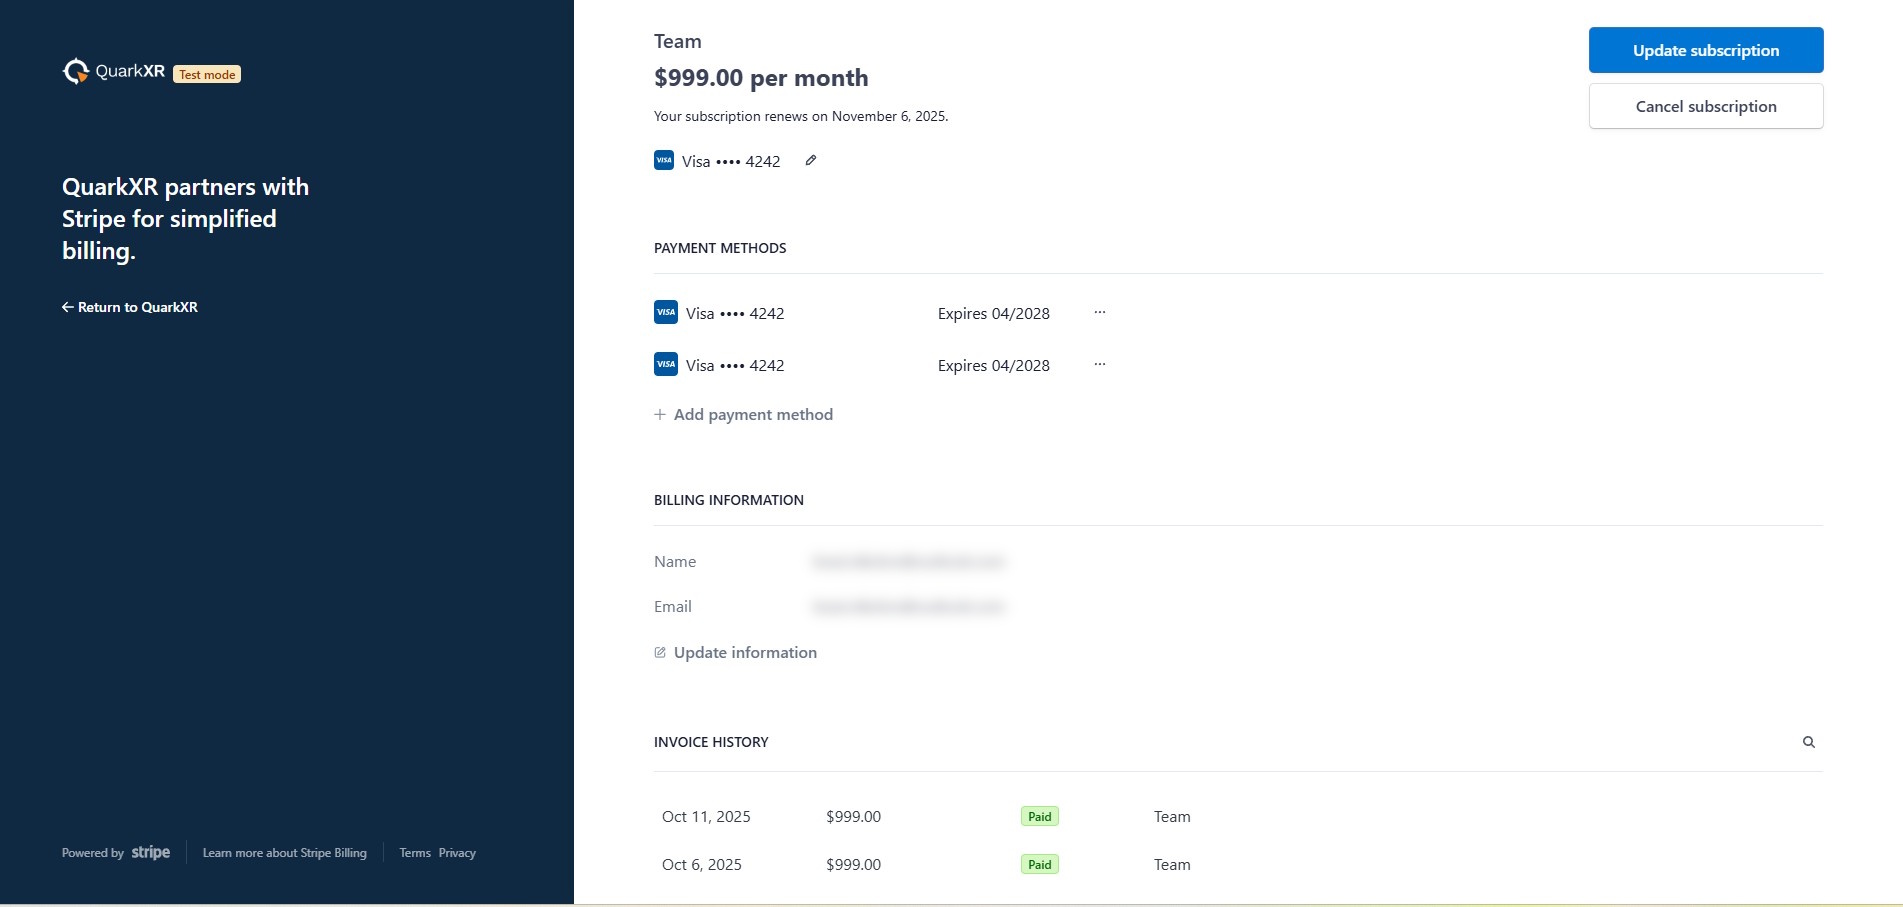
QuarkXR billing is handled through Stripe. To view or update billing details:
- Log in to the QuarkXR Portal. Refer to the 'Getting Started' section for more details about logging in.
- Click your e‑mail address at the top right to open the user menu.
- Select Manage billing. This redirects to a Stripe billing portal. From there you can view invoices, update payment methods or modify your subscription.

User Management
The QuarkXR Portal provides two types of user roles: admins and users. Administrators can provision Omniverse, VR, and Web instances and assign them to different users. They can also add or remove users and assign roles:
- Go to the Users tab. Refer to the 'Navigating the portal' section for more details
- Click Add User. A form appears with fields for Email, Password, Confirm Password, and Role (Admin or User). All fields must be completed; passwords must match. Click Create User to add the user to your workspace.
- Existing users appear in a table with columns Email, Role and Actions. Use the trash‑can icon to delete a user, or the pencil icon to edit a user email or to assign a different role.
Projects
Projects are containers for applications and 3D assets (usually ZIP or executable packages) that will be used with your VR or Omniverse instances. You can create an unlimited number of projects and upload files to each one. Uploaded files sync with the QuarkXR backend, and get automatically distributed to your Omniverse and VR instances, as soon as they are switched on.
Creating a project
- Open the Projects tab. Refer to the 'Navigating the Portal' section for more details.
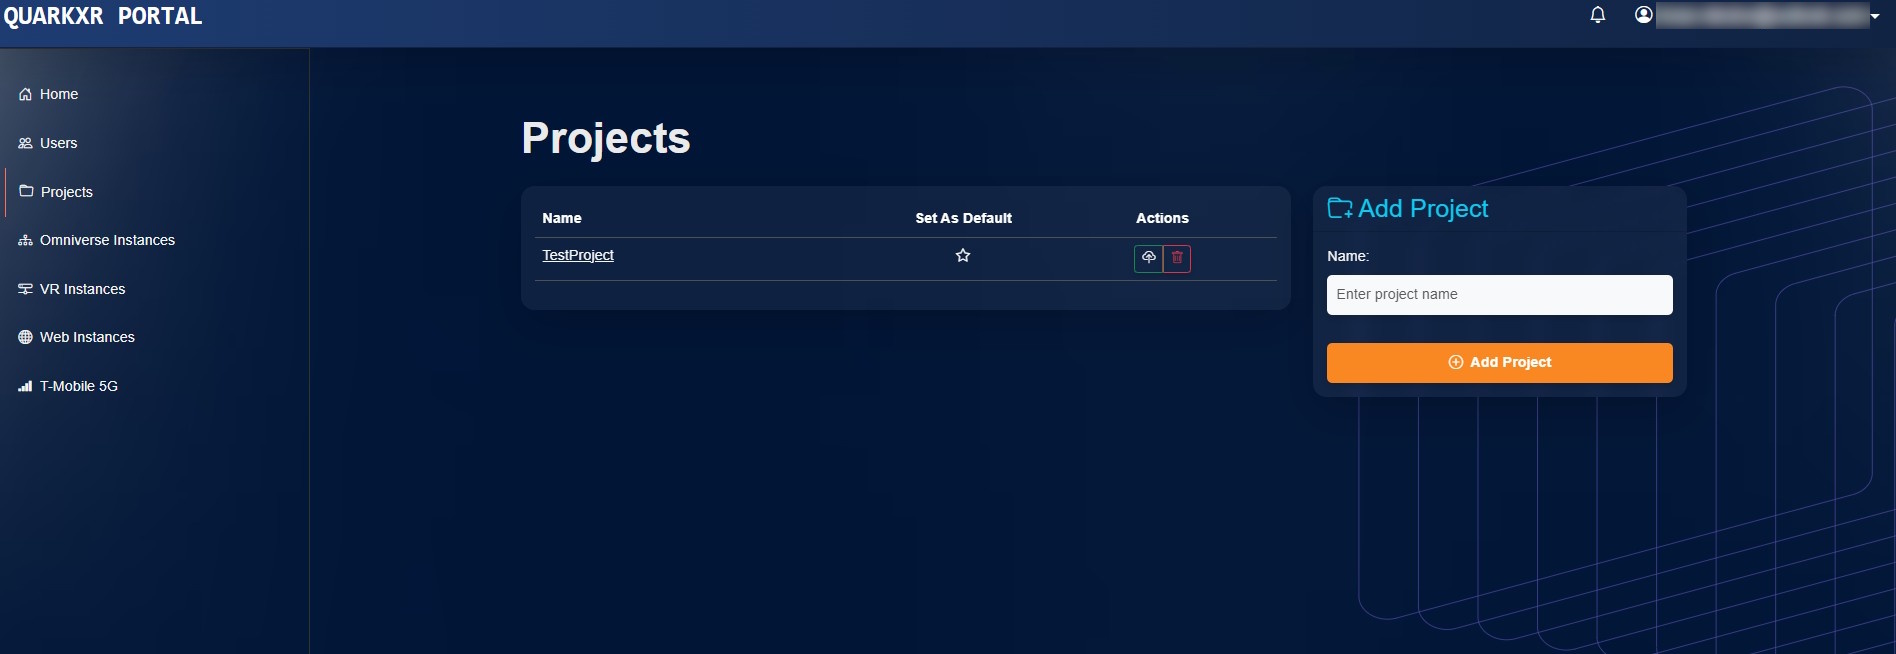
- On the right side is the Add Project form. Enter a project name and click Add Project. After creation you’ll see a success message and the project will appear in the table with options to set it as default (star icon), upload files or delete it.
- Set a default project. You can select a default project which will start on your VR/Omniverse instance by default. Refer to the next section to learn about uploading assets.
Uploading files to a project
Once you've created a project, you can upload applications and 3D assets to it.
- In the projects table, click on the green upload icon next to your project’s row (tooltip 'Upload Files').
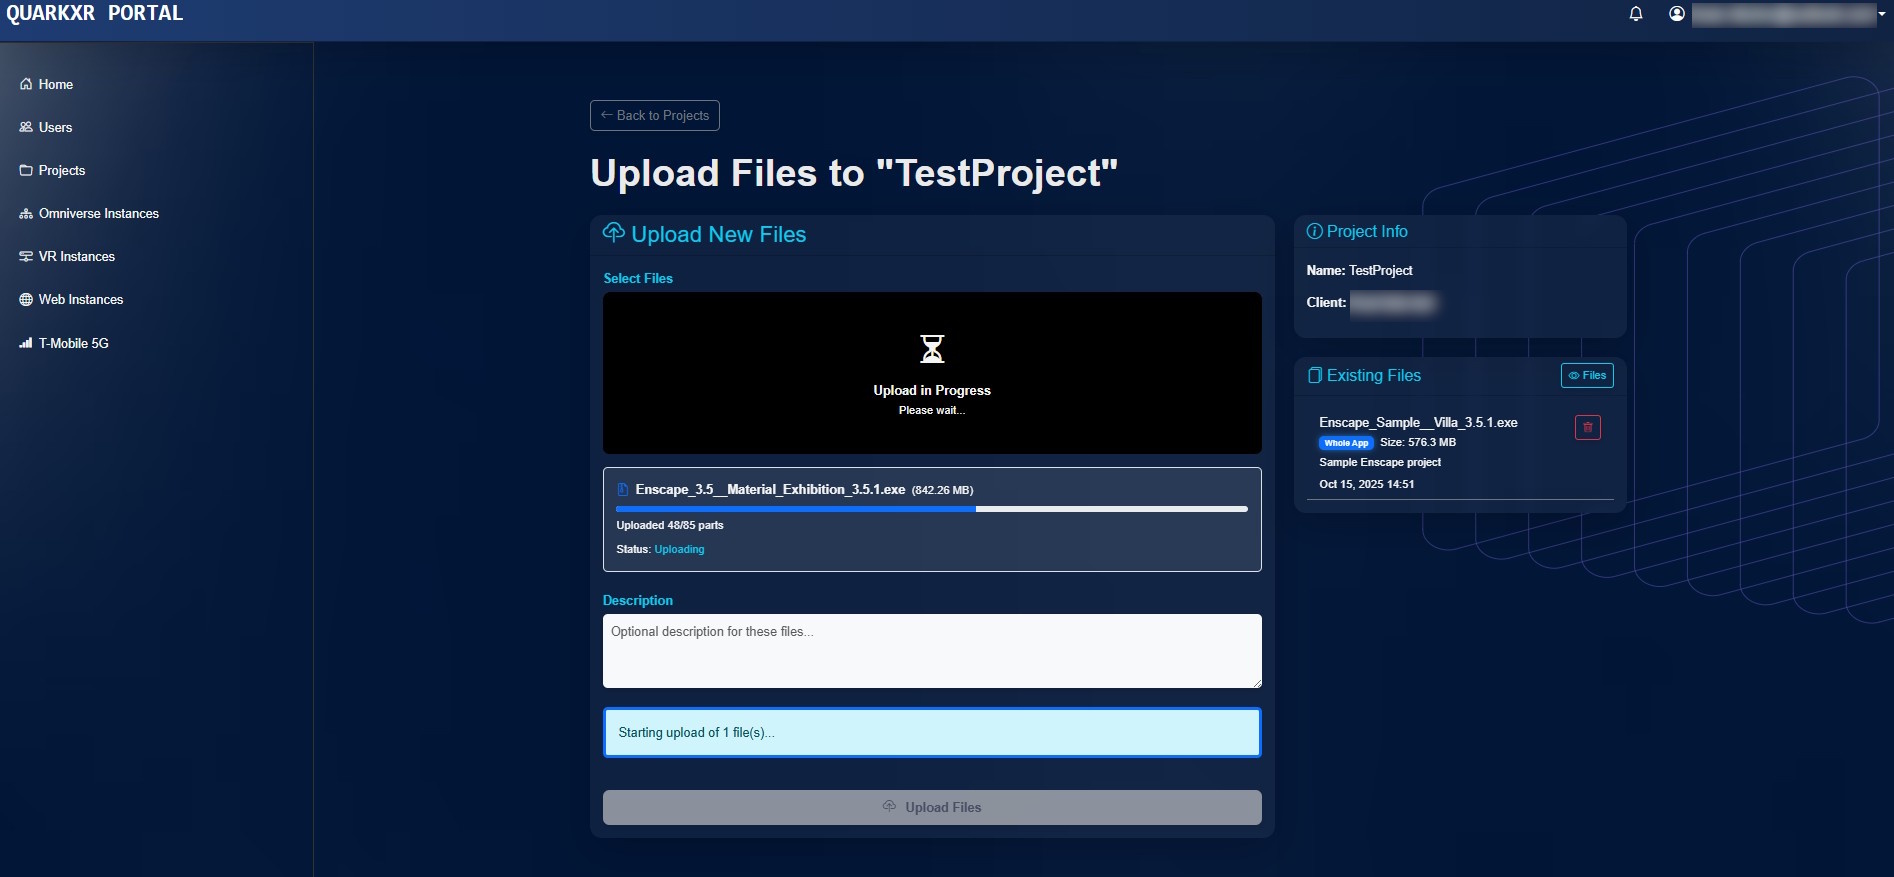
- On the Upload Files page, drag and drop files into the Select Files area or click the area to open a file selector. Supported formats are ZIP and EXE with a maximum size of 5 GB per file. You can provide an optional description for the uploaded files.
- Click Upload Files to start the upload. Uploaded files will appear under the Existing Files section showing filename, size, description, upload time and actions (view all files or delete).
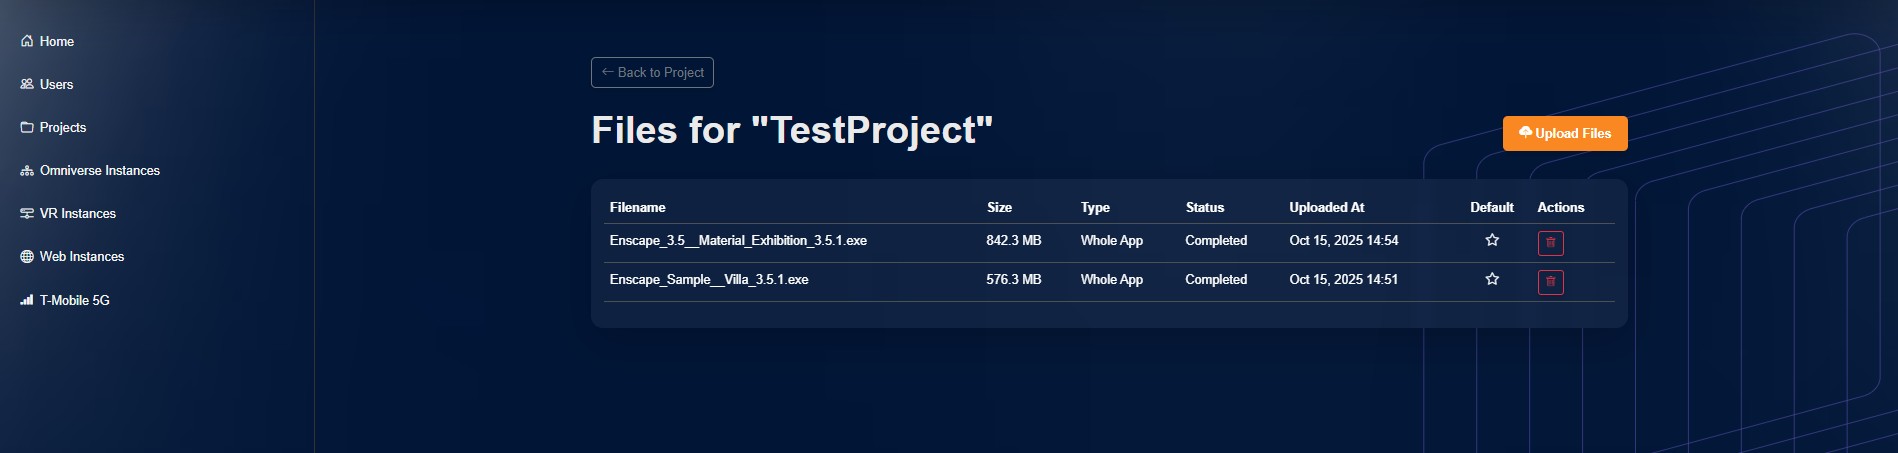
- To view all files associated with a project, use the Files button under Existing Files. The file list page shows columns Filename, Size, Type, Status, Uploaded At, Default and Actions. It also contains an Upload Files button for adding more files.
View existing files
You can view what files are uploaded to any projects by visiting the Files page:
- In the Projects tab, click on the name of the project you want to explore.
- On the Files page, you can see a file table with columns Filename, Size, Type, Status, Uploaded At, Default and Actions. The page also contains an Upload Files button for adding more files.
- From here you can also delete files or select a default file to be loaded by your Omniverse and VR instances.
Receiving file notifications
If you select a default project/file, the associated assets will be automatically synced to your Omniverse/VR instance once it is switched on and is in 'Running' state. Once the syncing process is complete, you will receive a notification via the bell icon next to your e‑mail.
Omniverse Instances
Omniverse instances are cloud‑hosted NVIDIA Omniverse servers used for 3D collaboration.
Creating an Omniverse instance
- Instance Name: must start with a letter and can include letters, digits, underscores and dashes (maximum 30 characters)
- Omniverse Region Group: choose the geographic region (e.g., Europe, North America).
- Omniverse Region: select the specific region within the group (e.g. Oregon, Frankfurt, or Singapore).
- Omniverse Instance Type: choose an instance size (the type of GPU resource).
- User: assign the instance to a specific user.
- Navigate to the Omniverse Instances section.
- On the right you’ll find an Add Omniverse Instance form. Provide:
- When all required fields are completed, click Add Omniverse Instance. The instance will appear in the table showing Name, State (provisioning, running, stopped), User and Actions.
Note: It takes roughly 15 minutes to provision and launch a new instance. Subsequent launches are very fast and take 1-2 minutes.

VR Instances
VR instances provision virtual machines for VR streaming.
Creating a VR instance
- Go to the VR Instances tab.
- Use the Add Instance form on the right. Enter:
- Instance Name: same naming rules as Omniverse instances (start with a letter; letters, numbers, underscores or dashes allowed; max 30 characters).
- Region Group and Region: select where the instance should run.
- Instance Type: choose a configuration with the appropriate GPU.
- User: assign to a user.
- After completing the fields, click Add Instance. The instance appears in the table with columns Name, State, User and Actions.
Note: It takes roughly 15 minutes to provision and launch a new instance. Subsequent launches are very fast and take 1-2 minutes.
Web Instances
Web instances are powered by AWS Appstream 2.0. They can host demanding 3D applications like Enscape, Unreal Engine, or Unity within the QuarkXR Platform.
Creating a web instance
- Navigate to Web Instances.
- In the Create Web Instance form, specify:
- Name: must start with a letter and may contain letters, numbers, underscores and dashes (maximum 15 characters).
- Region: choose where to deploy the instance.
- Image: select the base image/template from the drop‑down. If you need a custom image, contact QuarkXR Support.
- User: assign to a specific user.
- Click Create Web Instance. Your instance will appear in the table with columns Name, Status, URL, User and Actions.
- Copy the streaming URL to a new browser tab to start streaming.
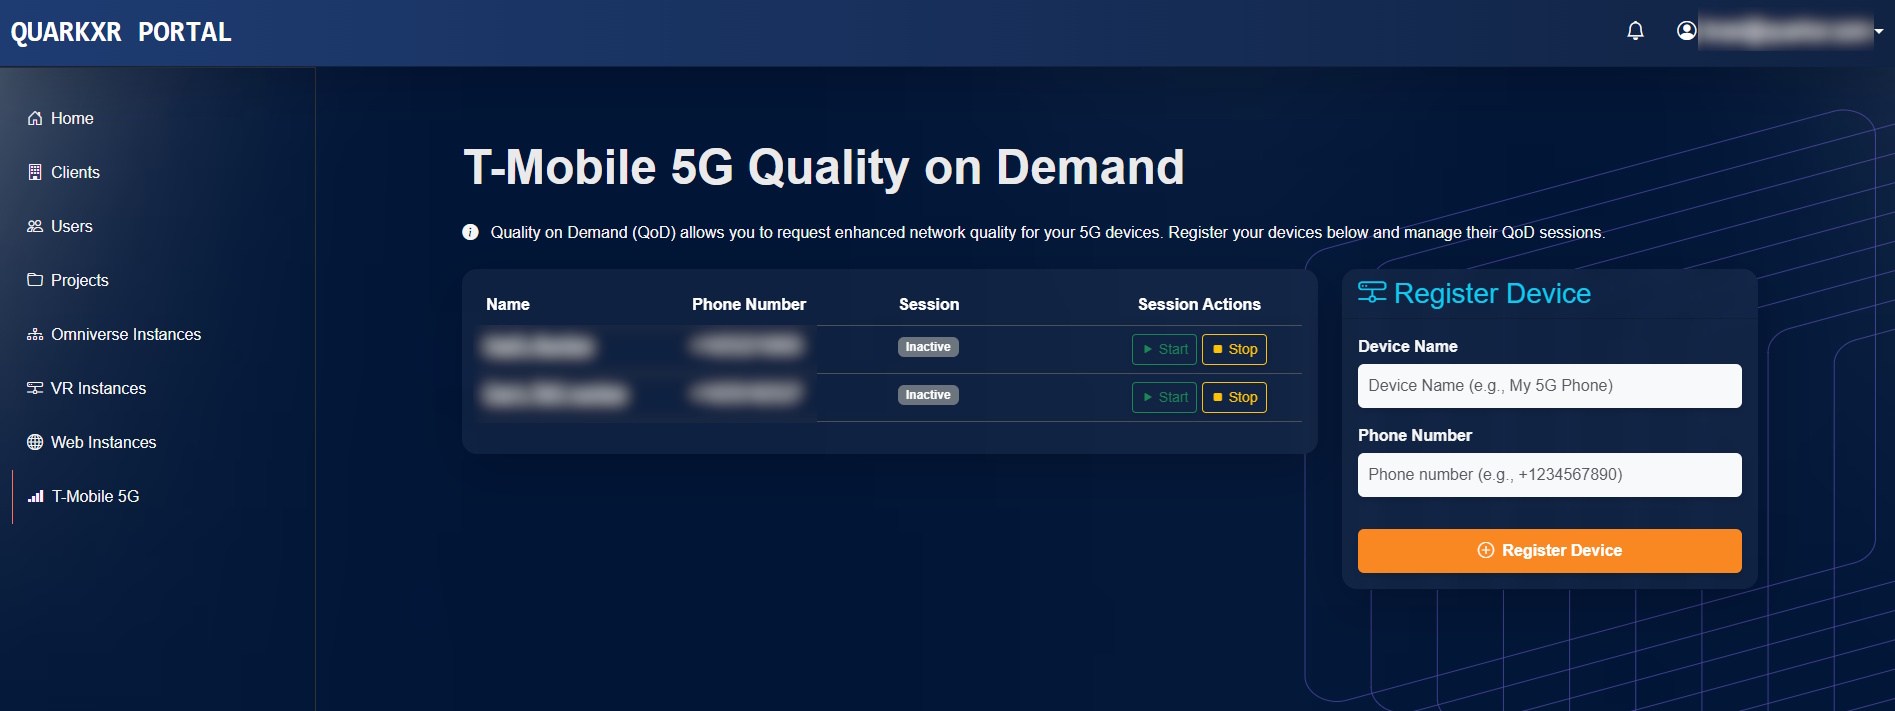
T‑Mobile 5G Quality on Demand (QoD)
The T‑Mobile 5G section allows customers with compatible 5G devices to request Quality on Demand (QoD) sessions. QoD sessions temporarily prioritize network quality for VR/AR streaming. The page provides information about QoD and includes a registration area where you can add your device and manage sessions.
You can read more about T-Mobile 5G QoD and request access here.
Contacting support
Feel free to reach out to us with any questions using our dedicated Contact form or by emailing business@quarkxr.com. We respond to customer support queries within 3 business days. Enterprise customers might have a different support channel available.